Step 1: Distribute the Outlook Plugin

Download BOTH plugin manifest files

Deploy the Plugin Files to Outlook

1. Log in to Office 365 Admin Center
  • Open your web browser and go to Office 365 Admin Center.

2. Navigate to the Microsoft 365 Admin Center: From the left-hand menu, select Show all to expand the menu
  • From the left-hand menu, select Show all to expand the menu
  • Expand Settings click on Integrated apps

3. Upload a Custom App
  • Click on Upload custom apps. Near the bottom of the page
  • Ensure the App type is set to Office Add-in.
  • Choose the option to Upload manifest file (.xml) from your device.
  • Choose Manifest.new.xml  from your downloads, Click Next to proceed.
  • Please Repeat this process for the other manifest file (Manifest.old.xml)
 

4: Deployment Settings

  • Choose to deploy the add-in to either All organization or Specific users/groups.

  • Click Next again to continue

5: Finish Deployment
  • Click Finish deployment to complete the process.

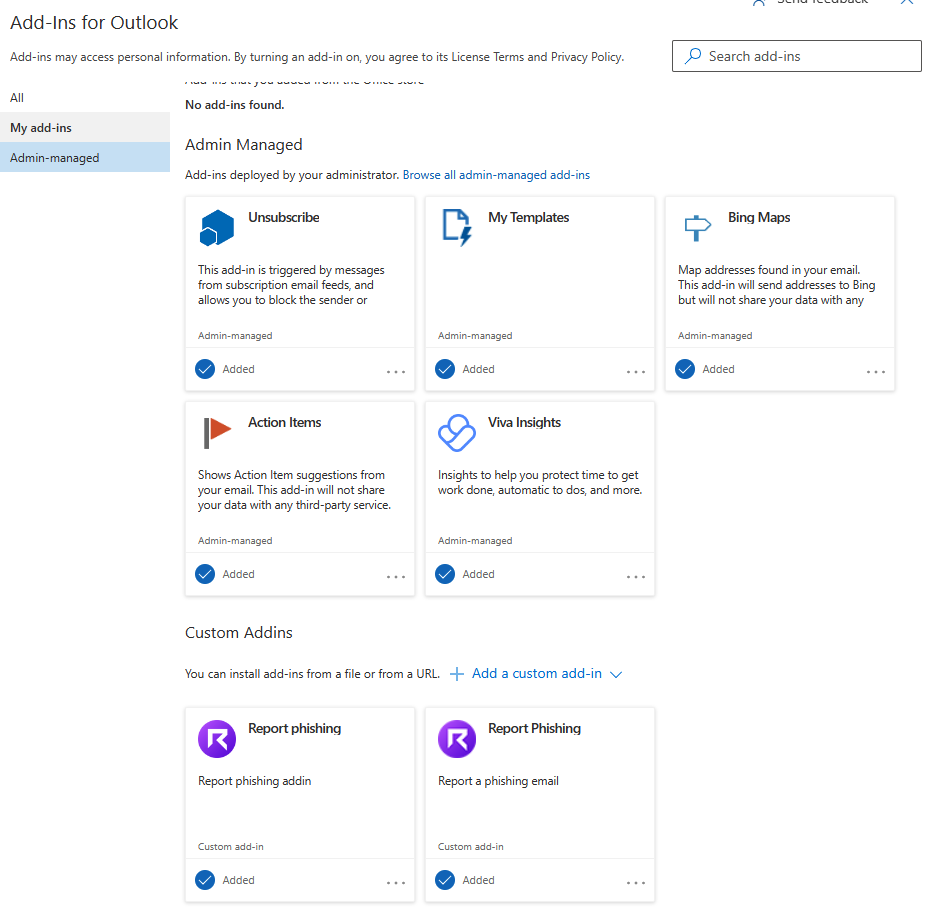
  • To confirm the deployment, check the Add-ins section where the new add-in should be listed.

6: Deployment Propagation
  • Note that it may take up to 6 hours for the add-in to be available for all specified users.

 
  1. Log in to Outlook Web Access.
  2. Click on the Settings gear icon in the upper-right corner.
  3. Select View all Outlook settings at the bottom.
  4. Navigate to Mail > Customize actions > Toolbar.
  5. Click on Manage add-ins.
  6. In the add-ins page, click on the Add-ins button.
  7. Choose Add from file and upload the .xml manifest file.
  8. Follow the prompts to complete the installation.
  9. Repeat this process for the other plugin file (both need to be installed)
  1. Open Outlook on your computer.
  2. Go to the Home tab.
  3. Click on Get Add-ins or Store in the ribbon.
  4. In the Add-ins window, select the My add-ins tab.
  5. Scroll down to the Custom add-ins section.
  6. Click on Add a custom add-in and choose Add from file…
  7. Locate and select the .xml manifest file you have.
  8. Follow the on-screen prompts to complete the installation.
  9. Repeat for the other manifest files (Both need to be installed)

Step 2: Distribute the Endpoint Agent

Download the Microsoft Installer (MSI)

Deploy the Agent to All User Machines

1: Upload the MSI to Intune:
  • Log in to the Microsoft Intune admin portal.
  • Go to Apps > All Apps > Add.
  • Select Line-of-business app and click Select.
  • In the App package file section, click Select file and upload your MSI file.
2: Configure App Information:
  • Enter the App name, Description, and other required details.
  • Click Next.
3: Assign the App:
  • In the Assignments section, select which users or devices should receive the MSI.
  • Click Next and then Create to deploy the app.
4: Monitor Deployment:
  • Go to Apps > All Apps in the Intune portal to view the deployment status and confirm successful installation on devices.
  1. For smaller environments or individual installations, follow these steps on each computer:

    1. Download the MSI File:

      • Provide the link to download the MSI file from your site, and instruct users to save it on their desktops or in a folder.
    2. Run the MSI Installer:

      • Double-click the downloaded MSI file to start the installation.
      • Follow the on-screen prompts to complete the installation.
    3. Verify Installation:

      • After installation, open Outlook to ensure the plugin is available and active.